designGardeningLandscaping May 10, 2024

How to Get a Colorful Garden Year-Round

The dream flower garden is lush and colorful all the time. Unfortunately, it’s not a simple dream to achieve in reality. With so many plants all with different internal timers and environmental requirements, putting together a garden can be like a puzzle even for experienced gardeners. Luckily, there are ways you can plan and care for your garden to maximize its beauty and color throughout all seasons. Here we’ll go over some tips for making sure you have a colorful garden all year.

Stagger Bloom Schedules

The first step in having year-round color in your garden is to plant flowers with different bloom times. After all, if everything blooms at the same time, it will all be dormant at the same time as well. To avoid this, try staggering different blooming schedules to cover the entire year. For example, if you plant lots of early summer flowers like iris and peonies, add in some sedums, asters and ornamental grasses that will bloom when the first group fades.

Depending on your climate, some flowers will even bloom in the winter. Try pansies, English primrose or hellebores for hardy winter color in both mild and colder climates. Check which plants will survive in your region before buying, though.

Mix Annuals & Perennials

Annuals bloom for one long season and then need to be replanted in order to bloom again. Perennials, on the other hand, only need to be planted once and will bloom again at the same time year after year. By mixing flowers of each type, you can cover more of the year with color. Annuals like petunias, snapdragons and chrysanthemum are vibrant choices that bloom at different times. Even though they need to be replanted for the following season, annuals typically stay in bloom for longer periods. A good mix of both will keep new colors popping up while others fade.

Go for Foliage

It’s not just flowers that are colorful. Many plants have decorative leaves just as striking and beautiful as flowers and a lot of them will stay looking good throughout their growing season. Caladium, coleus and canna lilies are all excellent choices for vibrant-colored leaves in a range of colors and variations. While these plants have their respective dormant seasons, they won’t wilt or fade away. This will allow you to keep some color year-round, no matter where you are in the flower schedule.

Gardening takes patience, practice and know-how. However, even with perfect planning and expertise nature can always surprise you. The more you know, the better you’ll be able to adapt to unexpected losses or any aspects of your gardening that don’t work out. Besides things like climate, soil and seasonality, research what plants go well together before planting so that your garden can thrive all throughout the year.

designHomeLandscaping April 29, 2024

4 Amazing Outdoor Decoration Ideas

There is an overwhelming amount of excellent options for outdoor decorations. Ideas for patio furniture, adding a fire pit or even a shaded gazebo are abundant, and it can be difficult to decide where to start.

To help you get inspired, here are some of the best DIY outdoor decor ideas to enhance your yard or patio space:

Install outdoor hanging curtains

Curtains are no longer just for inside the home! The most stylish and useful curtains for outdoor living are available at a variety of home goods retailers and can withstand a wide range of weather conditions.

Consider comfortable earth tone curtains to create shade on your patio. Or, add privacy without sacrificing the sunlight by hanging airy white fabric curtains.

Create a DIY privacy screen with plants

Make a beautiful centerpiece in your backyard with a privacy screen planter. By combining a large planter box or container and a trellis, you can encourage plants to climb and create natural shelter.

Another DIY outdoor decor idea is to create a partition with hanging planters. Construct a wooden partition using scrap materials and found wood from pallets. You can hang small planter boxes or small potted plants to create a vertical garden that also serves as a natural privacy screen.

Get creative with outdoor lighting

For maximum enjoyment of your outdoor space at night, make sure to include lighting in your patio ideas. There are plenty of ways to create DIY lighting, such as lanterns with mason jars, basket chandeliers and DIY tiki torches. Hang fairy lights to add ambiance and whimsy, while also providing the light you need to enjoy your space to the fullest.

Mix and match your outdoor furniture

One of the biggest trends in patio decor ideas is to mix and match your furniture. Arrange a collection of comfy chairs around a coffee table or fire pit in varying colors and styles. This creates a cozy and eclectic atmosphere and also makes it easy to incorporate some vintage or recycled DIY patio decor into your outdoor oasis.

Whether you want to add privacy or boost the aesthetics of your outdoor living area, keep these ideas in mind to inspire your design journey.


DYIGardeningHomeLandscaping April 15, 2024

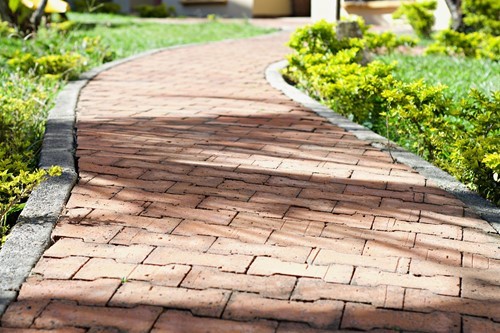
How to Build a Brick Garden Path

Creating a great garden path doesn’t have to be a long and difficult process. With the right tools and techniques, DIY enthusiasts of all skill levels can build a classic and functional brick pathway. Here we’ll go over the materials and process for your next garden path DIY project.

Materials

Cobblestones
Edging stakes
Granite pavers
Plastic landscaping edging
Sand
Spray paint (for marking)

Equipment

Rubber mallet
Level
Shovel
Mason’s chisel
Spade
Wheelbarrow

Safety Tips

Before you dig, contact your utilities provider to make sure you are not in danger of breaking power, water or cable lines. Always use safety equipment to protect yourself while working.

Process

  1. Plan the layout of your path. Use stakes and spray paint to mark the edges of your path. If you’re including curves, make sure they are gradual enough to avoid causing gaps between pavers.
  2. Measure out the width of the path using your brick pavers. Add a few extra inches on either side for adjustments and to help with making curves.
  3. Dig out a trench for your path with a shovel. It does not have to be even at first, you can always clean up the edges and make it level after you’ve defined the entire length of the path. Dig to a depth of about 7 inches.
  4. Take your plastic landscape edging and set it in the edges of the path. Then, using a mallet or hammer, drive stakes into the edging to secure it to the “walls” of your path.
  5. Add a layer of sand to the path, leaving about 3 inches of space between it and the top of the plastic edging. Use either a hand-tamper or a motorized plate compactor to tamp down the sand. To make it easier, sprinkle the sand with water so it’s slightly damp.
  6. Now it’s time to lay the pavers. Lay the stone pavers one by one, setting them tightly into the sand with the rubber mallet. If you are adding pavers along a curve, you can break pavers in half to fill in the gaps at the end.
  7. If you need to cut pavers to fit small gaps, measure them in place and mark with a pencil. Then, you can break the paver into smaller pieces using your chisel and mallet. Save the extra pieces in case you need them.
  8. Fill in the edges of the path where it meets the sod or ground with topsoil. Tamp the soil down so it’s secure.
  9. Fill the joints of your path with sand by pouring it on top of the path and sweeping with a large broom. Use slightly damp sand so it will stick in place. Save your extra sand for eventual maintenance in the future.

Now you have a fantastic traditional brick paver path for your garden. You can use this same method with any style of paver as long as you measure accordingly. Enjoy incorporating the path into the rest of your landscaping design and the benefits of your diligent DIY work.

HomeHome buyingReal Estate April 8, 2024

Are You Ready to Buy?

Are you ready to renew your home search this spring? As I am sure you are aware, the housing market remains tight. Still, as the weather warms, there are increasingly more homes coming on the market in northwestern Vermont. I’d love to help you get ready to find your place and make a winning offer. Here are a couple of recommendations:

First, if you are not pre-approved for a mortgage, do it now. A pre-approval requires submitting financial information to a lender that they use to verify that you can fund a purchase. It frequently takes a few days to process, there is no effect on your credit score, and the pre-approval is usually good for 90 days. Speaking of lenders, work with a local one. If there are two similar offers on a property, having a local lender who understands this market can be the deciding factor in sellers accepting your offer. If you don’t know any local lenders, I can recommend some whom I’ve worked with successfully.

In terms of funds to make your purchase, you will need enough cash to put an earnest money deposit on a property as soon as you go under contract. This is usually somewhere between 1% or 2% of the purchase price, but sometimes a higher deposit is appealing in an offer. Remember you will still need cash for a down payment and closing costs, so these should all be part of your planning as you decide on your budget. I always recommend having additional cash reserves in case something comes up in the first months of owning your home as well.

To get a jump on your search, please let me know what you’re looking for including your criteria and budget. You can also set up listing alerts on your preferred website to ensure you see new listings as soon as they come on the market. If a property is interesting to you, let me know and I’ll look into it further and arrange to see the property as soon as possible.

In terms of seeing properties, I know scheduling showings can sometimes be a challenge. If you can’t find a time to see a property in person, I am happy to arrange to do virtual viewings. I can be your eyes and ears–and nose. I can answer questions as we move through the house and help you get as close to seeing it in person as possible. Anything to make sure you have all the opportunity to get into your home when it comes on the market!

Let’s talk about what you’re looking for, whether you’re ready to gear up your search, and how I can help make it happen. Contact me today to get started!

HomeHome Repair April 1, 2024

HVAC Repair: When to Let the Experts Take Over

Your HVAC system can break down or develop damage for various reasons. While some HVAC repairs are simple and can be done on your own, others should be left to the professionals. Knowing when to have professional HVAC repairs done is an important part of ensuring your HVAC system can heat or cool your home reliably. Here are a few tasks a professional HVAC company should contend with:

Frequent Cycling

Your HVAC system might run longer than usual if outdoor temperatures are unusually hot or cold. However, your HVAC shouldn’t be running through cycles frequently. When this happens, your HVAC system turns on and off more often than it should. If you’ve noticed frequent cycling occurring, have professional HVAC repairs done.

HVAC technicians might be able to resolve frequent cycling with some simple maintenance. However, you might have this problem due to other reasons, such as the wrong size HVAC system for your home or a poorly placed thermostat. HVAC technicians can determine the cause and provide solutions.

Strange Sounds

HVAC systems normally make some noise when they’re running, but odd or unusual noises could signal a problem with your equipment. Rattling sounds might mean a component in your HVAC system is loose, while loud grinding noises can indicate a bigger problem, such as a damaged fan or motor. You should have HVAC professionals inspect your system to find the cause of these noises and make repairs as needed.

Lack of Air or Low Air from Vents

Warm or cool air should flow from your vents when you have your heating or cooling system running. If your HVAC system has clean filters but you still have airflow problems, schedule professional HVAC repairs. This problem can occur due to a refrigerant leak, frozen evaporator coils or a broken fan.

Warm or Cool Air

If your HVAC system blows warm air in summer or cool air in winter, replacing the air filter might help. Otherwise, you might have a problem with your HVAC system’s compressor or other damage which requires professional repairs. Have technicians inspect your system to determine the cause of this problem and perform any needed repairs.

DYIGardeningHome March 25, 2024

DYI Terrariums: A Beginner’s Guide

Terrariums are perfect for plant lovers who want to make their plants look like a work of art. While there are plenty of terrarium containers and kits available to buy, it’s very easy to make one yourself using other items. We’ll go over the steps to create your very own DIY terrarium for displaying plants in your home.

What You’ll Need

Terrariums leave lots of room for creativity, but require a few ingredients to be successful. You’ll need to have potting soil, your choice of plants and a small amount of activated charcoal. The charcoal will be crucial in soaking up extra moisture and preventing bacteria from growing in your mini-garden. Other recommended materials are decorative pebbles, sea glass or stones and sheet moss if you want to create an extra lush environment.

You’ll also need the most important piece: a glass vessel. Mason jars and other glass containers with lids work well, but you can also use vases or fish bowls for an open-air terrarium.

Which Plants to Choose?

The best plants for a terrarium depend on the type of glass vessel you use. If you are using a vessel with a lid, your terrarium will have a humid environment perfect for miniature tropical plants. If you’re going without a lid, it will dry out much quicker, making it great for succulents or cacti. If you are going to use a closed-lid terrarium, however, avoid succulents and cacti. The environment will be too moist for them and could cause damage to your plants.

Some suggested plants for your tropical terrarium include: small ferns, nerve plant, prayer plant, pothos and club moss.

For a drier, open air container, add succulents, cacti or even air plants.

How to Set Up Your Terrarium

The key to a healthy and attractive terrarium is to build in layers. Here are the steps:

  1. Add a layer of sheet moss or stones to the very bottom of the vessel to absorb moisture. Next, add the activated charcoal. Taller vessels like vases and large jars will need thicker moisture-absorbing layers than shallow containers.
  2. Scoop the potting soil in, making sure it’s deep enough for the roots of your largest plant. Shake loose any extra soil attached to the roots of your plants before adding them. You can also trim the roots if they are especially long, which will slow the plant’s growth and keep it terrarium-sized.
  3. Beginning with the largest and building your design around it, add your plants. It’s a good idea to plan your arrangement before building to make sure everything will fit. With your fingers or a spoon, dig small holes in the soil for each plant and set them in securely.
  4. For a finishing touch, add a layer of decorative pebbles, stones, sea glass or more moss depending on preference. To maintain a healthy terrarium, mist occasionally with a spray bottle. For an open-air container, water the soil directly after letting it dry out completely.

Once you have the basics covered, you’ll find there’s no limit to the amount of creative arrangements you can make. Terrariums make excellent centerpieces, decorative accents and gifts. Experiment with terrarium building and enjoy the satisfaction of plant care combined with DIY craft.


HomeTechnology March 12, 2024

5 Smart Appliances You Should Try

Image by Angelo Esslinger from Pixabay

When we think of smart home appliances, it can be easy to think of virtual assistants like Alexa or Siri. But the truth is that smart home technology is integrated into nearly every appliance you can think of. Some of these gadgets are created primarily for convenience (e.g., starting your coffee maker when your alarm clock goes off). Some are designed to pay for themselves many times over. We’ll look at five that have great rates of return.

Smart Thermostats

Smart thermostats track resident location to determine where you are and when you’ll be back home. This kind of intuitive feature has been known to save up to 15% on cooling and 12% on heating. It’s calibrated to cut energy by just enough to conserve your resources but not enough so it has to overwork by the time you get back. The return on investment (ROI) of your smart thermostat will depend on how often you’re home and what temperature you target. If nothing else, it means you don’t have to reset it every time you go on vacation.

Smart Moisture Sensors

Water damage is a seriously expensive problem for any homeowner to have. Smart moisture sensors can detect a puddle tucked in a back corner or a small leak in the walls that hasn’t yet made its presence known. Before you even have the chance to expose residents to mold or make the call to a repairman to fix the walls, you’ll get an alert whenever there’s trouble. It’s a great way to stave off excess bills.

Smart Smoke/Carbon Monoxide Detectors

Smart detectors will send alerts to your phone just in case you’re not there when something occurs. This makes it easier for you to take action during the initial stages of the problem. Luckily, the smart smoke detectors of today were built to distinguish between dangerous smoke and someone who burnt their toast. They’re so effective that many insurance companies give discounts or rebates when you buy them.

Smart Sprinklers

Do you always forget to turn off your sprinklers when there’s rain in the forecast? Don’t take the chance when you install smart sprinkler systems. By automatically adjusting the output based on external conditions, you’ll avoid drowning your lawn. This appliance is controlled by an app and highly recommended for anyone who prizes their garden or lawn.

Smart Plugs

It’s easy to leave the light on when you leave a room. A smart plug gives you the option of controlling your electricity even when you’re not home so that you don’t have to pay the bills for one simple mistake. Whether you go to the store for an hour or on vacation for a week, you get total peace of mind. Plus, you can use smart plugs to make it look like someone is there even if they’re not.

People invest in smart home technology for many reasons, but a common one is because they’re looking to actually make more money than they spend. When you prioritize efficiency with better technology, you can cut back on your utility bills.


FinancingHomeReal Estate March 4, 2024

Budget Basics: Planning Your Home Renovation

Photo by Skylar Kang from Pexels

Your social feed is likely filled with plenty of inspiration for your next home improvement project. It’s easy to scroll past images of sparkling kitchens and sleek basements and decide that now is the best time to take on your next renovation project. The next step is figuring out how to pay for everything that you want.

This guide will help you create a realistic budget that you can stick to for your next home improvement project. Outlining and adhering to a budget throughout the process will help your project move forward seamlessly. Here’s what you need to do in order to create a home improvement budget:

Research the Average Costs for Your Chosen Project

There are some home improvement projects that are more costly than others. It is important to have an understanding of the average costs associated with the project of your choice, as this will help you decide if now is the right time to take on that project. For example, these are the average costs associated with common renovation projects:

  • Kitchens cost between $15,000 and $35,000 to renovate.
  • Bathrooms cost between $5,000 and $20,000 to renovate.
  • Basements cost between $10,000 and $20,000 to renovate.
  • A new roof can cost about $10,000 to install.

Itemize the Individual Costs

Once you have decided on the home improvement project that you want to pursue, you will need to itemize the individual costs. These costs can include the cost of materials, the cost of installation and the cost of labor. You should know how much of your budget is being spent on each item because it will allow you to make adjustments if needed.

Determine Where You Can Save on Costs

If you want to reduce the overall cost of your home improvement project, you can often find creative ways to save money. For instance, you may be able to reduce the cost of labor by taking on some of the work yourself. You may also be able to purchase materials from a wholesale supplier for a lower price.

Get Estimates from Contractors

Once you have determined a price point that you are comfortable with you can start getting estimates from qualified contractors. It is important to be honest with the contractors about your budget so they can determine which options are best for you. You may find that contractors are willing to work within your budget in order to secure the job.

Decide How You Will Pay for the Project

Before work begins on your home improvement project, you should come up with a plan for paying it. You may be able to pay cash up front for the project but you should also know that financing is often available.

It’s important to remember that there is a wide range of budget possibilities for any home improvement project. You can choose a budget-friendly approach that allows you to renovate your home for the lowest possible price, or you can opt for a luxury project that spares no expense. There is no right or wrong way to improve your home. You simply have to find the price point that works for your personal needs.

HomeReal EstateTechnology February 26, 2024

What Do You Know About Home Automation Hubs?

Home automation can be a combination of different devices, or you can turn it into a central system that controls everything from your security to your lights. The question is, what’s the best way to keep all of your technology organized so it can all work together? Minimizing hiccups in your experience starts with having an idea of your options. We’ll look at what you need to know about home automation hubs and how they can help you keep track of your devices.

  1. ‘Hub’ Can Refer to Multiple Products

A hub is essentially the center of your home automation system, connecting devices and ensuring they work together. In some cases, an individual device will come with a hub. For instance, the smartphone application for your sprinkler system allows you to set your parameters and then have the technology learn your preferences from there. If you have multiple automated features in your home, you might opt for a separate hub so you can check all of your data in one place.

  1. Hubs Depend on Your Communication Methods

Wired and wireless devices are working in harmony like never before, but this doesn’t mean that you can assume all of your devices will be compatible. When you select a hub, you have to take into account the existing technology in the house. Luckily, most manufacturers are including more devices than ever before. Different brands and operating systems can talk to each other and work together.

Often, the technology won’t be as efficient as if you’d purchased everything from the same company – just keep in mind this inefficiency is a matter of degrees. The extra second or two it takes to connect the devices and get them communicating with each other might not be worth making bigger purchases for.

  1. Hybrid Hubs Can Do More

Smart home hubs can be combined with other kinds of technology like mesh routers to do more than just control your lighting from one place. This option would be perfect for a larger home with Wi-Fi dead zones throughout the property. Not only can you see what’s happening in a big house this way, but you can also eliminate any disruption to your coverage.

  1. Home Assistants Are Not a Direct Substitution

There are several choices in voice-controlled assistants that can serve as a hub for your smart devices. While they certainly can take place of a home automation hub, they don’t offer the same degree of control. For basic systems, some homeowners might not even notice. However, if you want access to all the features, you might need to purchase a hub made specifically for more advanced technology.

Even if automation hubs aren’t strictly necessary, they can quickly feel that way to homeowners who use them. Whether you’re just exploring home automation or adding your fifth device, keep in mind how a hub can help.

designDYIHome February 19, 2024

Building Beautiful Wall Art with Your Photos

Image by PublicDomainPictures from Pixabay

With so many pictures stored away on digital devices, we forget how enjoyable images of children, friends and memorable experiences in our living space can be.

Selecting several of your more meaningful photos for a photo showcase adds character to your home and demonstrates that you value family, connection and staying active.

On top of that, those photos will get a lot more views than they would on Instagram. And they’ll inspire you to create new memories. Check out these useful ways to create beautiful wall art with photos.

Build Your Own Frames

Yes, you can create your own frames. And it’s easier than you might think. Doing it yourself opens up a world of possibilities. Choose any colors, mediums, shapes or designs.

  1. Select your materials. We could create a typical wooden frame here. But why not think outside the box? Use driftwood, pine cones, bark or re-purposed materials from old furniture or industrial machinery. Scavenge for ideas to settle on a theme that works well with your decor.
  2. Measure dimensions for the frame. Don’t forget to leave some room for a mat.
  3. Cut your frame to size with wood saw, hacksaw or scissors, depending on the material. Don’t forget to put on your eye protection.
  4. Paint before assembling. If you plan to paint the materials, do so before putting things together. It will be easier to get into all the crevices and off areas that you want a different color.
  5. Assemble your frame. Place the glass over the photo to protect it or leave it open. For safety, you’ll probably want to head down to a crafts store to find the right size versus trying to make it yourself.

Utilize Canvas Like the Pros

A canvas gives any photo display a fun and unforgettable backdrop. The art becomes your free-form frame on which you can pin pictures, trinkets and other items.

You don’t have to be Monet to decorate a canvas. Instead, try these fun techniques. But before you start, lay out some plastic. This can get messy.

Stencils & Painter’s Tape

Use painter’s tape to create straight lines across your canvas. Or consider creating other shapes by taping construction paper cut-outs, stencils, leaves or other items to board. Then paint over them and remove the items.

Sponges & Color

Get a bunch of sponges and bowls of paint. Soak up the paints with the sponges. Then express yourself. Depending on the look you’re going for, you can use neutral tones that go with your decor. Or create your canvas with pops of color that people notice from across the room.

After your canvas dries, add photos at various angles for a playful look. Or measure and evenly space the images, creating a more traditional appearance.